Tag: diy

  • 🌊 Ocean-Themed Bathroom Makeover for My Daughter

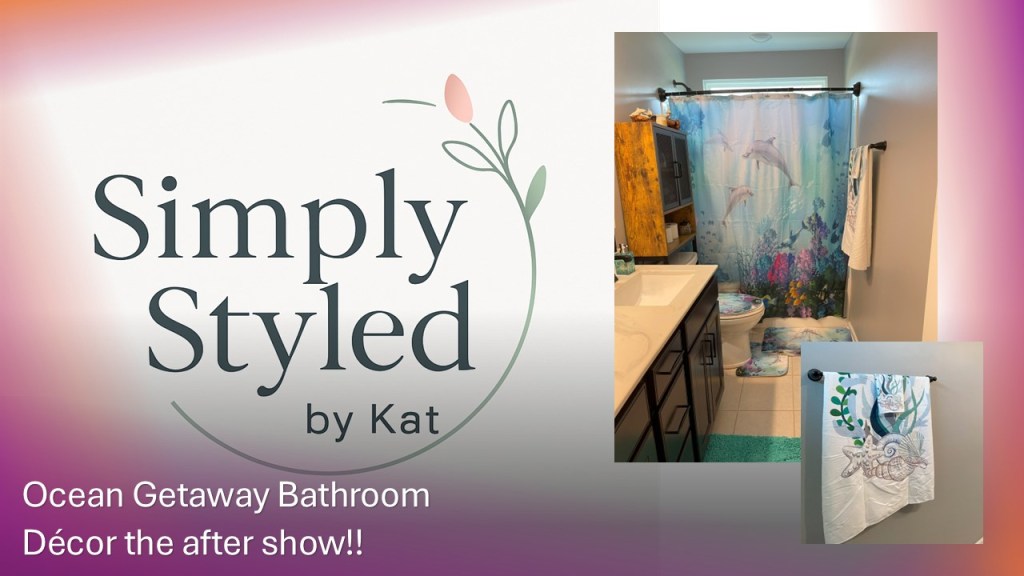
    When it came time to refresh my daughter’s bathroom, I wanted to create something playful, calming, and full of imagination. Since she’s always been drawn to the ocean — from seashell collecting to mermaid stories — an ocean theme felt like the perfect fit.

    Inspiration

    Honestly, this whole project started with something simple — replacing my daughter’s worn-out toilet seat cover. What should have been a quick swap turned into a full ocean-inspired transition. Once I got going, I leaned all the way in, pulling in as much ocean fun as I could find. She loves visiting her grandmother GiGi at the beach, and the two of them share a special love for sea turtles, so it felt like the perfect theme to bring into her bathroom.

    Color Palette

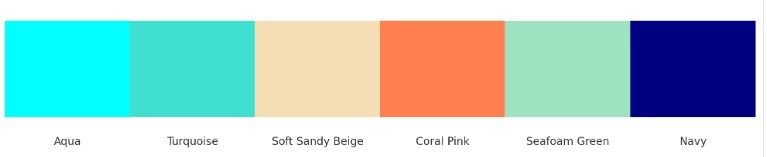
    I started with shades of aqua, turquoise, and soft sandy beige to mimic the look of water and shorelines. White trim kept the space fresh and clean, while touches of coral pink added a pop of vibrancy.

    Key Details

    Shower Curtain: A playful under-the-sea print with fish, coral, and bubbles set the tone.
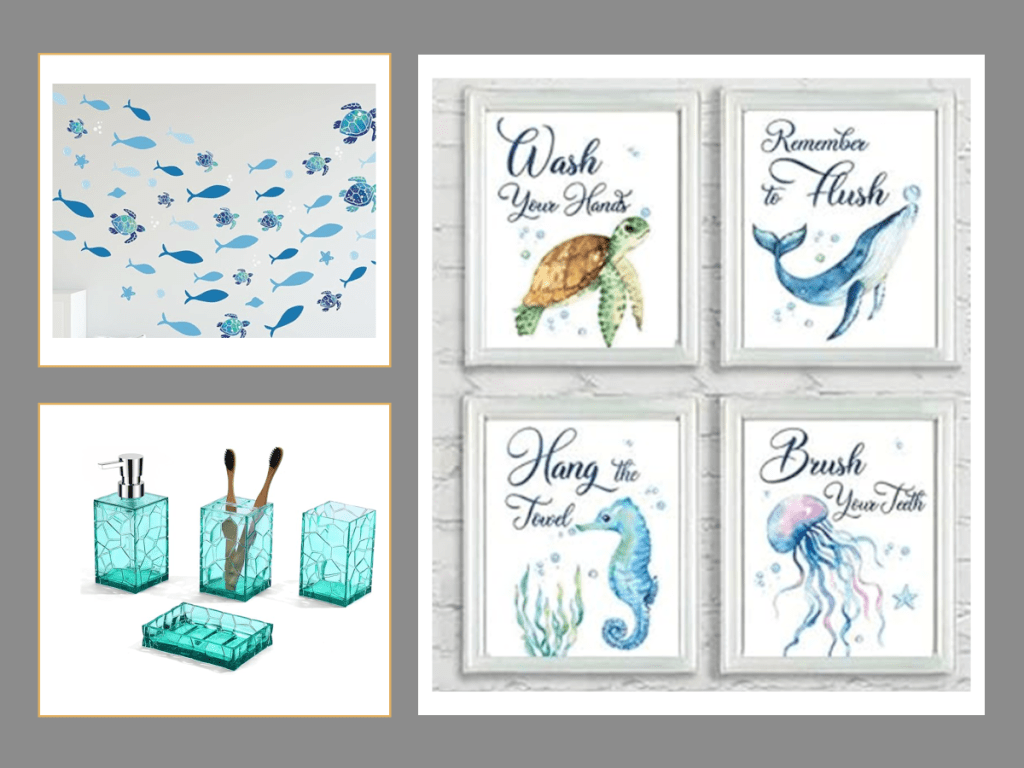
    Wall DĂ©cor Prints: I found the cutest print set that playfully reminds kids to “Wash your hands” and “Remember to Flush?” — little touches that make the space fun while encouraging good habits. I paired them with these sleek frames for a polished look.

    Playful Wall Stickers: To really bring the theme to life, I added these removable ocean wall decals. They made the room feel like you’re diving under the sea without the permanence of wallpaper.

    Accent Towels & Rugs: I scored these matching towels and rugs, and they coordinated perfectly with the shower curtain, pulling the whole room together.

    Extra Accessories: I also added this playful bathroom set with toothbrush holders and soap dispensers, plus these fun hooks that made hanging towels easy and on-theme.

    Chenille Rugs: These turquoise chenille rugs are a favorite of mine — so soft, absorbent, and durable that I’ve used them in multiple bathrooms. They layered beautifully into the space and gave it a cozy feel.

    Nice Touches

    Sometimes it’s the personal pieces that make a room feel truly special.

    • We had a pair of inherited dolphin sculptures that never really fit anywhere in the house — until now. They found their perfect home in this bathroom, adding both sentiment and style.
    • A little treasure jar filled with shells and sea glass we’ve collected on family trips adds a personal, ocean-wanderer vibe.

    Final Thoughts

    This makeover reminded me that you don’t need to do a total remodel to make a big impact. With a few smart dĂ©cor choices, a little DIY, and themed accents, you can completely transform a space.

    ✹ Want to see more of my home projects, seasonal dĂ©cor finds, and DIY makeovers? Check out my YouTube channel and Linktree for all the latest!

  • Tackling HVAC Noise in the Bedroom: Our Acoustic Panel Wall Transformation

    We must have a thing with AC units
 because no matter where we move, they somehow find a way to cause chaos. In our last house, the unit was so far away from the primary bedroom that it was always either freezing or way too hot, depending on the season. So when we moved into this new place, we crossed our fingers that HVAC wouldn’t be a problem.

    Whelp… that didn’t last long.

    The First Night Reality Check 😳

    The very first night in our new bedroom, we both turned to each other and said:
    “Oh my god
 is it really that loud?”

    It was.
    We placed our hands on the wall—and we could feel the vibration. Not just a hum
 a full-on buzz. It was absolutely nuts!

    Step One: Call in the Pros


    Like any good homeowner, our first instinct was to get it checked. We had three separate inspections, and each time the verdict was the same:

    “Everything’s working fine!”
    And of course, it never sounded that loud when the tech was there. 🙄

    Step Two: Try, Try, Try Again

    ✅ Fix #1: Rubber Mulch + Vibration Pads

    Vibration Pad for HVAC we used: https://tr.ee/kk2VEH
    We replaced the large river stones surrounding the unit with rubber mulch to reduce the chance of vibration bouncing off the rock and into the house. We also added vibration pads underneath the unit itself to soften any low-frequency rumbling.
    Result: Helped a little. But not enough.

    ✅ Fix #2: Insulating the Lines

    Insulated Pipe Wrap: https://tr.ee/Lq8hm1
    We secured and insulated all the trunk lines, wiring, and pipes running from the unit into the wall.
    Result: Another small improvement—but not the solution we needed.

    The Breakthrough: Acoustic Panels

    After way too many late-night YouTube rabbit holes, we started looking into ways to dampen the wall itself, rather than fighting the HVAC unit.

    We always dreamed of doing a barnwood or shiplap accent wall, but to make it effective as a sound barrier, we’d need to install an underlayment first—driving up the cost and time. Just not worth it.

    Then we found Tonor Acoustic Panels.
    These are stylish, adhesive-backed sound-dampening panels that people were raving about for podcast studios, noisy apartments, and more.

    Step-by-Step: Installing Tonor Acoustic Panels

    Want to try it yourself? Here’s what you’ll need and how we did it:

    đŸ› ïž What You’ll Need:

    • ✅ Tonor Acoustic Panels
    • ✅ Painter’s tape or laser level
    • ✅ Measuring tape
    • ✅ Pencil or chalk line
    • ✅ Scissors or a sharp utility knife
    • ✅ A second person (trust us, it helps!)
    • ✅ Optional: spray adhesive or command strips for repositioning

    The before image of the “vibrating” wall

    đŸ§± Installation Steps:

    Step 1: Plan your layout.
    Decide if you want a geometric layout, stacked hexagons, or a straight grid. We sketched ours out on paper first.

    Step 2: Mark your wall.
    Use painter’s tape or a laser level to make sure your panels will line up correctly. Our wall wasn’t square, so this part was key.

    We noticed there was a little variance between the panels

    Step 3: Test a few panels first.
    Hold a few panels on the wall before peeling the adhesive backs. Make sure the color and layout look right.

    Step 4: Peel and press!
    Carefully peel the backing and apply each panel firmly. Press and hold for a few seconds to ensure strong adhesion.

    Overall, we love the look but we had to work through the gappage!

    Step 5: Fill in the gaps.
    Use scissors or a utility knife to trim edge pieces to size. We had very minor gapping, but it blended in well!

    Step 6: Step back and admire.
    The wall looked amazing—and it worked! The noise was dramatically reduced.

    Don’t mind the messy bed, we had to move everything around!!

    The Final Result: Stylish & Quiet 🎉

    The end result? It looks amazing—like a custom accent wall.
    But more importantly:

    The sound difference is INSANE.

    That wall no longer buzzes. The bedroom is calm, quiet, and cozy. We actually look forward to going to bed without worrying about HVAC noise keeping us up.

    The final final, lol! Gave me an excuse to rework the whole room…

    Would We Recommend Tonor Panels?

    Absolutely YES.
    They’re budget-friendly, easy to install, and gave us both peace and style. If you’ve got a noisy room—or just want a cool wall feature—these panels are so worth it.

    Thanks for following along with our bedroom glow-up! Let us know in the comments if you’ve tried something similar—or if you’re dealing with an annoying HVAC noise too. We’d love to hear how you solved it!

    💬 Don’t forget to subscribe to the blog for more DIY makeovers, design hacks, and lifestyle content from Simply Styled by Kat!

    Watch the full YouTube Video here: